[EN] Colorize Pro+ Manual
Introduction
This module allows you to apply different colors to your products without the need to create the corresponding images.
A very significant time savings if you manage multiple colorways!
Click here to see the demo Colorize Pro+
Based on prestashop attributes (color palette), you simply activate the module product of your choice. The module automatically applies the selected color from the product (the transparent png format) picture.
No need to waste valuable time to create your images and save them in the backoffice, finally manage as many color variations as you want!
Functions
- Colorize your products in 1 click!
- Preview inversion (animation)
- Special colors (gold, silver, mirror)
- Zoom type 'magic zoom'
- Transparency support of PNG files!
- Pack licenses 1, 3 or unlimited number of field.
- Simple installation
Install
In the Prestashop administration panel (BO), select the Modules tab, then click on "Add a new module"
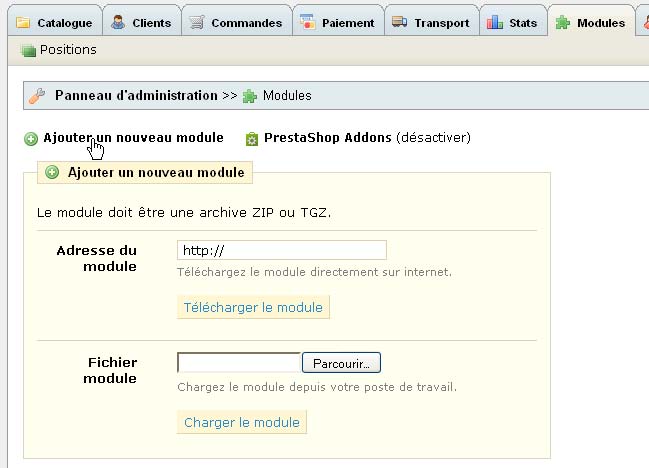
Click "Browse" and find the archive file (.ZIP). Load the module.
You get this:

Click "install" and the module will create a new tab:
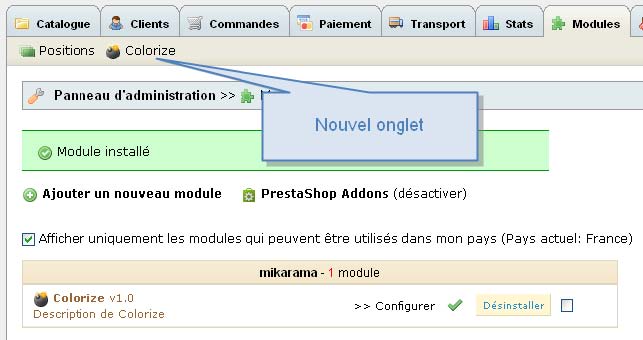
The installation procedure automatically performs the following tasks for you:
- Creation of the tab Modules>Colorize tab
- Backup the file /images.inc.php in /modules/colorize/backup
- Replacement of the file /images.inc.php by the module's one
- Creation of the new feature "Colorize" used to indicate which product uses the module Colorize
- Creation of new attribute group "Orientation" which lets you choose between Normal and Inverse
The included version of images.inc.php in the module activates the transparency of PNG files for all your shop. Only the files added after the installation would be appended. |
|---|
Uninstall
The uninstall procedure puts back in place the original file /images.inc.php and removes the tab Modules > Colorize. It does not remove the "Colorize" feature neither does it remove the "Orientation" attribute group.
Add a Colorizable product
In BO, go to "Catalog" then click on "Add new Product".
1. Infos Tab – Define your product as "Colorizable"
In order to differentitate the "classical" products from the "colorizable" products, we use the "Colorize" feature. That feature must be set to ON for "colorizable" products. For Colorize Pro module, use PRO.
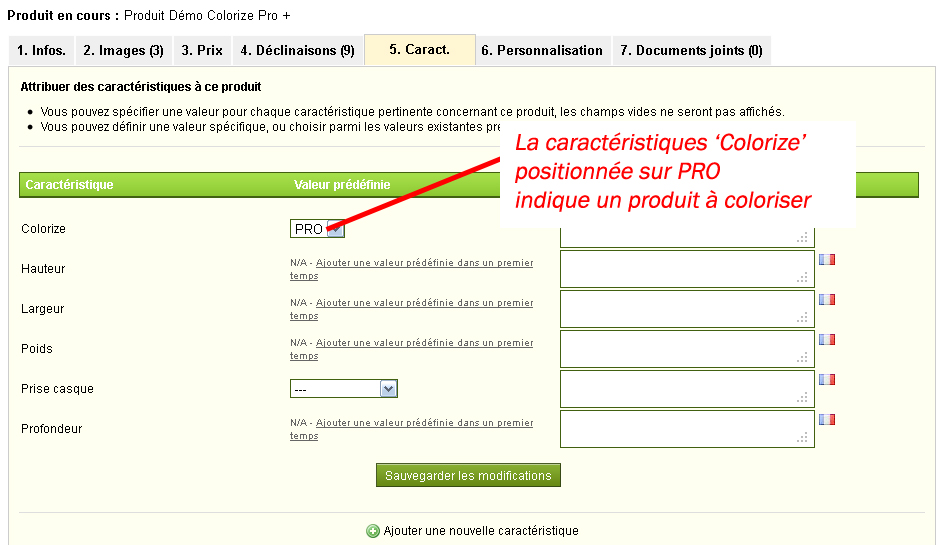
Click on "Save and Stay" :
2. Images Tab - Add the pictures to colorize
2.1 Format d’images
In order to be colorizable, the image must be in PNG Format with transparency.
Here's a correct example :

The blue background is not in the picture (the picture is the elephant), it's being displayed by transparency.
And here's an incorrect example :

The blue background is hidden by the white background of the picture (the elephant), therefore it can't be colorized.
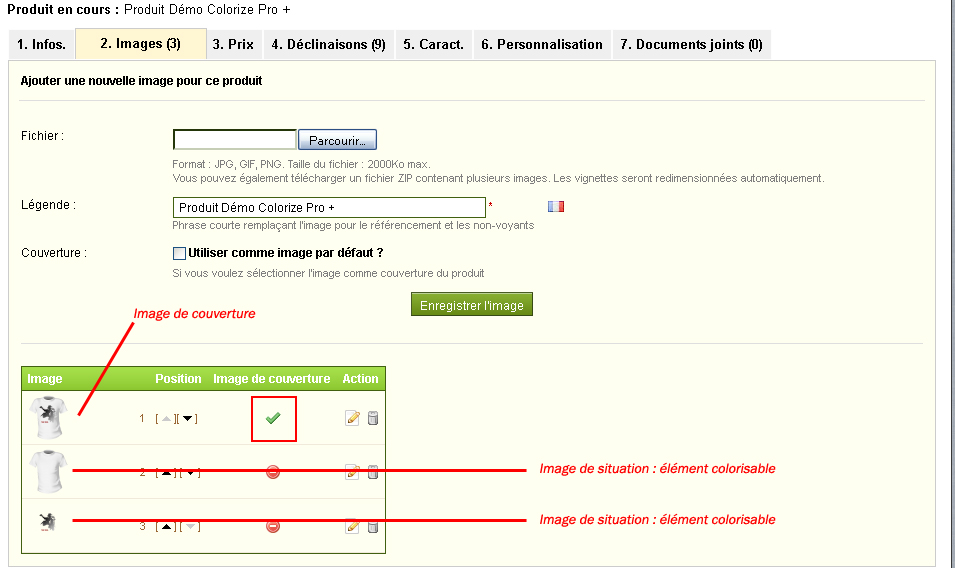
2.2 "Cover" Picture & "Situation" Picture
The Cover picture, is the picture with all the colors -meaning not colorizable. It's the one picture which would be displayed on the Categories pages. For instance :

In the Image Tab of a Product :
- Select your cover picture by clicking on the "Browse" button
- Tick the box "Cover : Use as default image ?"
- Add "[x]" at the end of its legend
Situation pictures are the ones that would be colorizable by the Colorize Pro + module. The working process is quite simple : for each colorizable element, you'll have to create a picture (like a layer of colors). With some image-processing software, you'll need to extract each color layer of the cover picture and save the files separately in PNG format (transparent).
In the Image tab of Product management, you simply have to add each color (file) in pile order from bottom to top.
Here's a complete example of a colorizable product with Colorize Pro+. T-shirt & logo are colorizable by 2 group of colors.
Please note that the module is supposed to be working with ThickBox (not jqZoom). Image size : thickbox : 600px * 600px |
|---|
3. Combinations Tab
3.1 Create you group colors
For each colorizable element of your product (ie. the files you generated by extracting the layer colors from the cover pricture), you'll have to create a color group attribute with a special naming-convention : The name parameter must be 'color'+number., the Public name can be anything you'd like. For instance
Name : color1
Public name : Color 1
Name: color2
Public Name : Color 2
...etc.
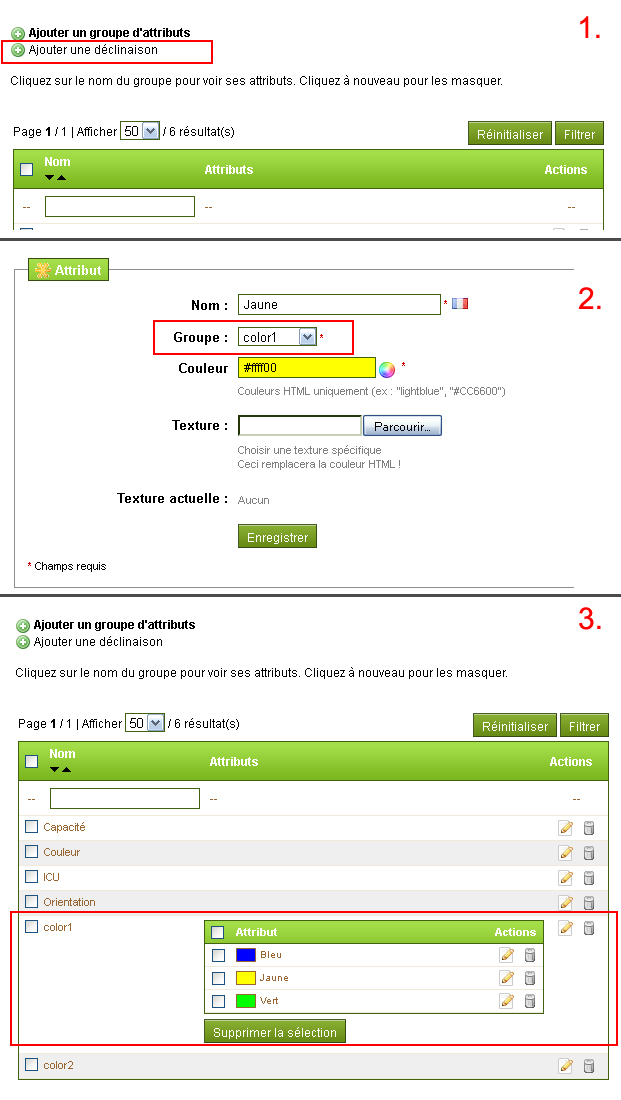
HOWTO :
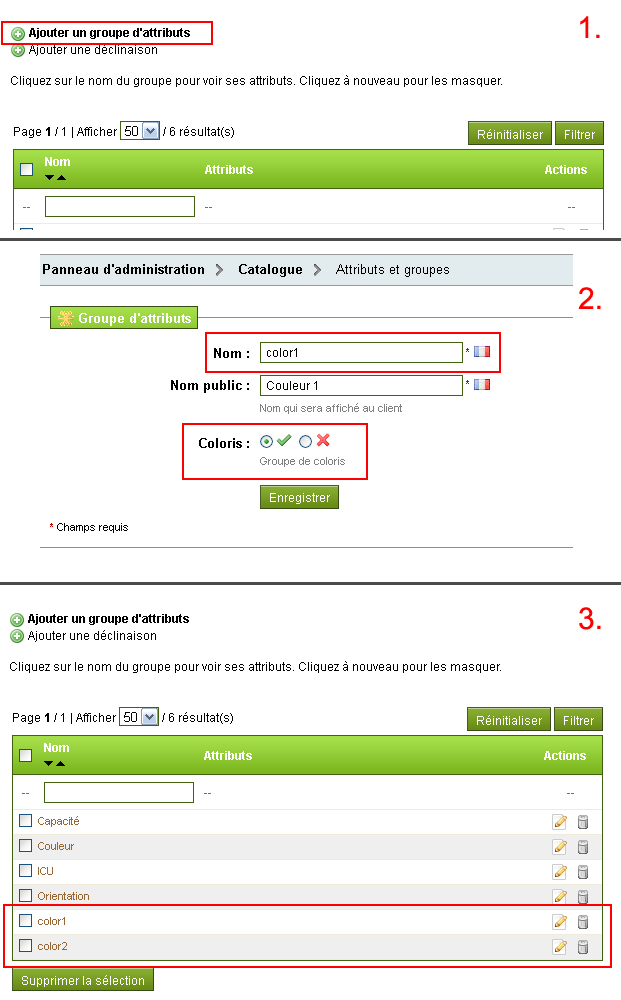
Thenfor each group you created, you simply have to add or create your colors. For instance :
3.2 Add your colors to your product !
By using the Product Combinations Generator, you'll have to add as many group colors as there'd be colorizable elements for your product (note that you can create as many color group as you want).
Notes :
- Always use color groups in chronological order (user of color1, color2, ...etc)
- Make sure you delete all pre-set combinations
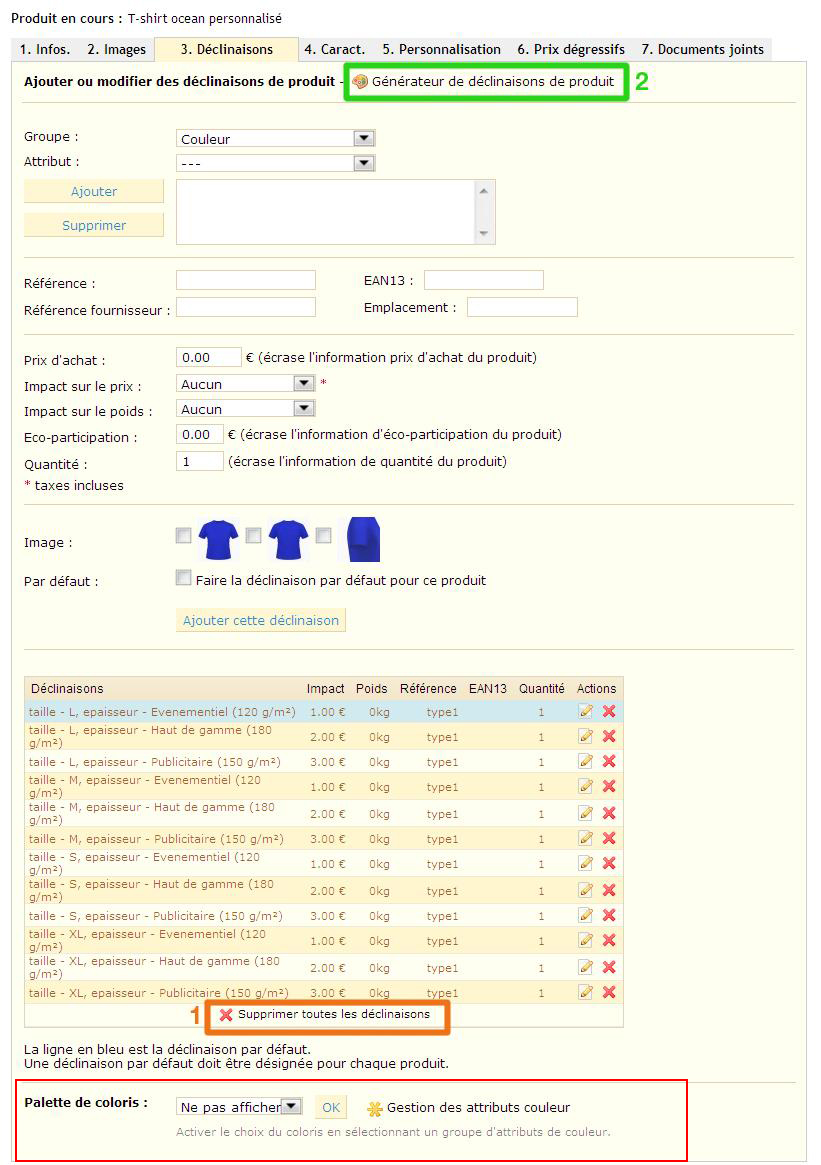
It is MANDATORY to display the color picker : just set the Color Palette selectbox on the first color group you'll be using for the product
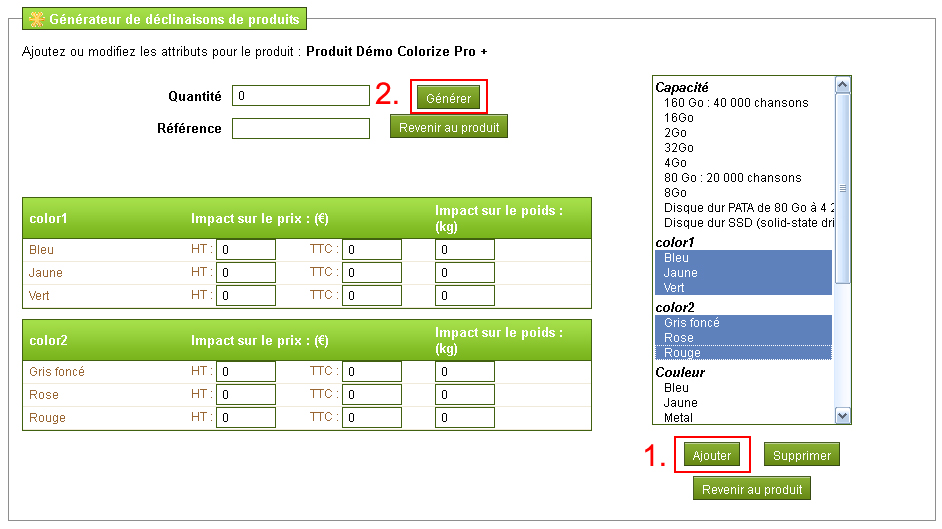
Add colors to apply to the product :
- Select your colors with Ctrl+click or Maj+Click
- Click on 'Add'
- Fill in the Impact Prices if any
-> Click on 'Generate'
4. That’s all Folks !
Congratulations !! you just created your first Colorizable Product with Colorize Pro+. You can still use all the functions of the Prestashop platform for your products.
However, please note that the watermak filter has not yet been tested with Colorize Pro +.
![]()
For your installation to be complete,
you can personnalize Colorize... Learn more about the Configuration Options...
![]()
5. Configuration (optional)
5.1 .swf size
swfwidth parameter of the swf/colorize.conf file, allows you to modify the size of the .swf file.
Example (extract of file colorize.conf) :
"domain": {
5.2 Opacity of group colors
colorOpacity parameter of swf/colorize.conf file allows you to modify the opacity of color groups : 1 for 100% of color application (like alpha 100%), 0 for 0%. It affects the intensity of the color layer applied to the product layer.
Example (extract of colorize.conf) :
"colorPicker": {
http://www.configurateurvisuel.fr
© 2012 - 2013 Mikarama.fr - All righs reserved, re-production & re-distribution are forbidden.